 |
GeNN
3.3.0
GPU enhanced Neuronal Networks (GeNN)
|
 |
GeNN
3.3.0
GPU enhanced Neuronal Networks (GeNN)
|
In this tutorial we will learn to add synapsePopulations to connect neurons in neuron groups to each other with synaptic models. As an example we will connect the ten Hodgkin-Huxley neurons from tutorial 1 in a ring of excitatory synapses.
First, copy the files from Tutorial 1 into a new directory and rename the tenHHModel.cc to tenHHRingModel.cc and tenHHSimulation.cc to tenHHRingSimulation.cc, e.g. on Linux or Mac:
Finally, to reduce confusion we should rename the model itself. Open tenHHRingModel.cc, change the model name inside,
We want to connect our ten neurons into a ring where each neuron connects to its neighbours. In order to initialise this connectivity we need to add a sparse connectivity initialisation snippet at the top of tenHHRingModel.cc:
The SET_ROW_BUILD_CODE code string will be called to generate each row of the synaptic matrix (connections coming from a single presynaptic neuron) and, in this case, each row consists of a single synapses from the presynaptic neuron $(id_pre) to $(id_pre) + 1 (the modulus operator is used to ensure that the final connection between neuron 9 and 0 is made correctly). In order to allow GeNN to better optimise the generated code we also provide a function that returns the maximum row length. In this case each row always contains only one synapse but, when more complex connectivity is used, the number of neurons in the pre and postsynaptic population as well as any parameters used to configure the snippet can be accessed from this function.
Because we want to use the GPU to run this initialisation code we, once again, need to override some options:
The defaultSparseConnectivityMode option controls sparse connectivity will be initialised. The VarMode::LOC_DEVICE_INIT_DEVICE setting means that initialisation will be performed on the GPU and no host memory is allocated to store a copy of the connectivity. This setting should generally be the default for new models, but section Sparse connectivity initialisation modes outlines the full range of options and shows how you can control this at for each connection.
Now we need additional initial values and parameters for the synapse and post-synaptic models. We will use the standard WeightUpdateModels::StaticPulse weight update model and PostsynapticModels::ExpCond post-synaptic model. They need the following initial variables and parameters:
We can then add a synapse population at the end of the modelDefinition(...) function,
The addSynapsePopulation parameters are
Adding the addSynapsePopulation command to the model definition informs GeNN that there will be synapses between the named neuron populations, here between population Pop1 and itself. As always, the modelDefinition function ends on
At this point our model definition file tenHHRingModel.cc should look like this
We can now build our new model:
-c option as described in Tutorial 1.Now we can open the tenHHRingSimulation.cc file and update the file name of the model includes to match the name we set previously:
Additionally, we need to add a call to a second initialisation function to main() after we call initialize():
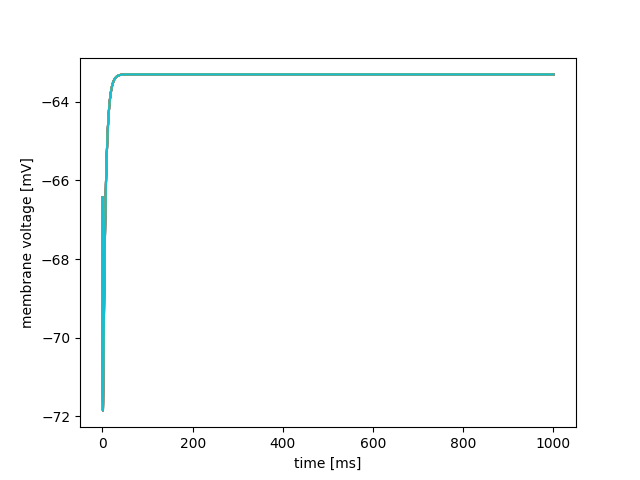
This initializes any variables associated with the sparse connectivity we have added. Finally, after adjusting the GNUmakefile or MSBuild script to point to tenHHRingSimulation.cc rather than tenHHSimulation.cc, we can build and run our new simulator in the same way we did in Tutorial 1. However, even after all our hard work, if we plot the content of the first column against the subsequent 10 columns of tenHHexample.V.dat it looks very similar to the plot we obtained at the end of Tutorial 1.

This is because none of the neurons are spiking so there are no spikes to propagate around the ring.
We can use a NeuronModels::SpikeSource to inject an initial spike into the first neuron in the ring during the first timestep to start spikes propagating. Firstly we need to define another sparse connectivity initialisation snippet at the top of tenHHRingModel.cc which simply creates a single synapse on the first row of the synaptic matrix:
We then need to add it to the network by adding the following to the end of the modelDefinition(...) function:
and finally inject a spike in the first timestep (in the same way that the t variable is provided by GeNN to keep track of the current simulation time in milliseconds, iT is provided to keep track of it in timesteps):
spike_Stim[n] is used to specify the indices of the neurons in population Stim spikes which should emit spikes where  .
.At this point our user code tenHHRingModel.cc should look like this
and tenHHRingSimulation.cc` should look like this:
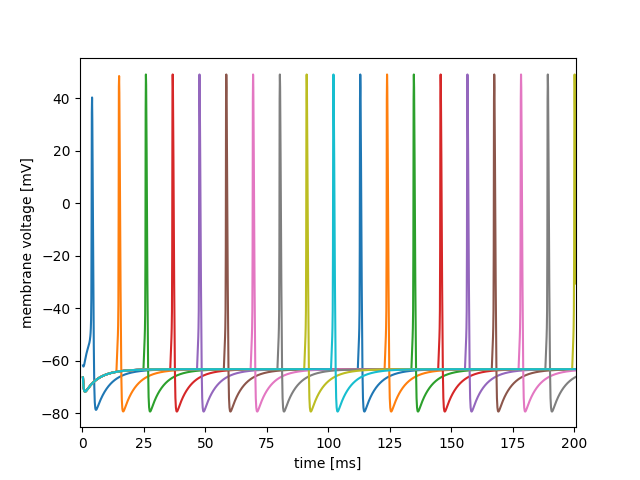
Finally if we build, make and run this model; and plot the first 200 ms of the ten neurons' membrane voltages - they now looks like this:
